Posted by admin | Posted in Beer, Drink, Drinking, Foraging, Homebrew, Root beer | Posted on 20-05-2011
Tags: Food
Dandelion & Burdock Beer:

I started fermenting a new batch of root beer from dandelion and burdock last night.
The recipe is extremely simple…
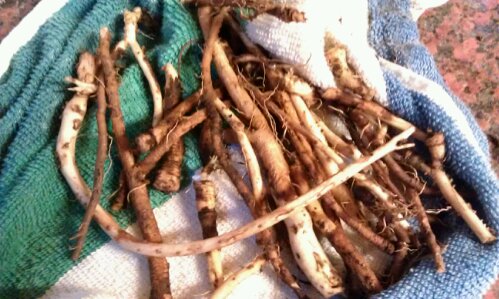
First go forage for some dandelion root and make somebody happy by removing a gardener’s more hated weed. Next forage for burdock root – not so obvious but a quick read up and you’ll be able to pick it out in a hedge row.

Here’s what I used:
15 dandelion roots
3 decent sized burdock roots
A small chunk of ginger root (mine was about 5cm as was all I had left)
700g sugar
dash of honey
7L water
Method:
Scrub the roots to remove dirt, then boil in the biggest saucepan you have – mine is only 1 gallon but you add extra water later. Boil all roots including ginger for an hour.
If you are already into homebrew you’ll know how important hygiene is – ensure everything you use from now on has been sterilised either with boiling water, bleach or a sulfide (campden powder/tablets).
At the end of the boil add the lemon juice and any other ingredients such as honey.
You need to cool the brew now to a temperature you can ferment at – preferably around 30°C (luke warm).
Add the brew to a fermenting bucket and top up with water (pre boiled and cooled is ideal).
Pour in the sugar. If you have a hydrometer use it to check the specific gravity (sugar content) although you already know this more or less since the ingredients for this brew are so simple. Mine was S.G.=1.035 which will give an alcohol strength of about 4.3% when done. More sugar = more alcohol.
Now you can either add the yeast to the bucket or preferably make a yeast starter (see yeast packet) and add that.
Ferment for about a week or until fermentation has stopped (no more bubbles rising to top) with a lid loosely covering bucket.
That’s it for the brewing at minimal cost. The sugar costs around 50p, the rest is minimal and you end up with up to 14 half litre bottles.
Bottling: first sterilise the bottles. Next you’ll want to prime them for some fizz. This is simply adding a small amount of sugar so that fermentation restarts in the bottle building up a little carbon dioxide gas.
Need to be careful here not to over do it as you’ll end up with exploding glass.
Add about a teaspoon (5ml) per litre either to each bottle or as an equivalent amount to the whole batch before syphoning into bottles.
Glass bottles now need to be sealed using a metal crown (cap) or using the swing tops.
Using plastic bottles for your first brew can be wise as you can squeeze the bottle every so often to get an idea of pressure build up. If you made a mistake you can unscrew the cap slightly to let gas escape. Not ideal but a safe bet for beginners.
I made this a couple of years back using autumn roots which are usually recommended but couldn’t wait this season so the current brew is a Spring batch.
Enjoy.